
 |
Prior to shipping the slides, there are some steps that you will want to perform. Slide mounts that are severely warped or bent may not be suitable for scanning. If we encounter problems with your mounts, we will notify you and present you with a couple of different options depending on the severity of the problem. In rare cases, the slides must be mounted in new mounts. We do charge a service fee for remounting, or we can return the slides to you so that you can remount them yourself.
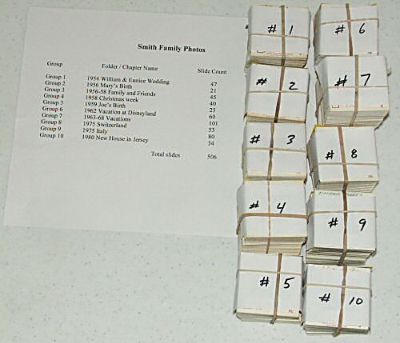
When preparing your slides we recommend that you create groups of about 50 slides. Stack the slides from one group in front of you with the viewing side of the mounts facing up. Arrange the mounts so that the top of the image is at the top or the left (for portrait photos). The slide at the top of the stack is slide No.1 and should be marked accordingly. You do not need to mark a number on each slide if you don't want to - just the first slide.
Create an instruction sheet that will outline the group ordering and the name of each group. These names will become the folder names on your CDs and Data DVDs. If you order the DVD Video Slideshow, these names will also be used as your chapter names on the video. Please type the instruction sheet or make sure that the your handwriting is very legible.
For added protection we strongly recommend that you place the slides in Ziploc bags. By doing so you will eliminate the chance that your slides will pick up moisture or dust from the packing material during shipment. Package the bags of slides in a shipping box with foam or newspaper for cushion . We recommend that you do not ship in soft containers such as a padded envelope.
| |

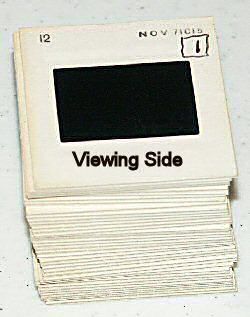 The first slide in each of your groups should identify the side of the slide that you would view the slide from if it was sitting on a light table or you were holding it up to the light of a window. Most slides are labeled on the "screen side/non-viewing" from the lab that processed your slides. If your slides are not labeled, you should label the first slide in the group and then ensure that all slides within the group are uniform. The "screen side" of the mount is:
 Be sure to secure each stack of slides with 2 rubber bands to make sure that they don't get mixed up during transportation. Take a small piece for paper for each stack and write the sequence number of each stack so that we understand the order in which the groups are to be arranged on your discs